
By Adrian Darden Kautz, History ’27, Digital Initiatives Assistant
I have been working in the Archives & Special Collections Digital Initiatives unit since my first semester of college, and now I am about to finish my fourth semester! When I first took this job, I did not know much about digitizing historical materials, but I was excited to learn and get experience in this field. Now with nearly two years of this work under my belt, I am happy to say that I know my work is benefitting lots of people. The materials that I work with show the stories of hundreds of people, and making them accessible online connects people to the past. Also, my work has benefitted me hugely because this work is a great experience for my future self. Not only have I learned a ton about digitization, but I have found that this work excites and intrigues me and is something that I would love to do for a long time. Even after two years, though, I can and do learn new things.
The second half of this semester, I began digitizing film negatives in our photo studio. I had previously never worked with photo negatives, so doing it for the first time was a little daunting. I didn’t want to mess up these important pieces of history, and I wanted to do them justice by making their digital version as perfect as possible. Despite my fears, the process was easy to learn and exciting to do. The work I have done has been well received and I am proud of my success.

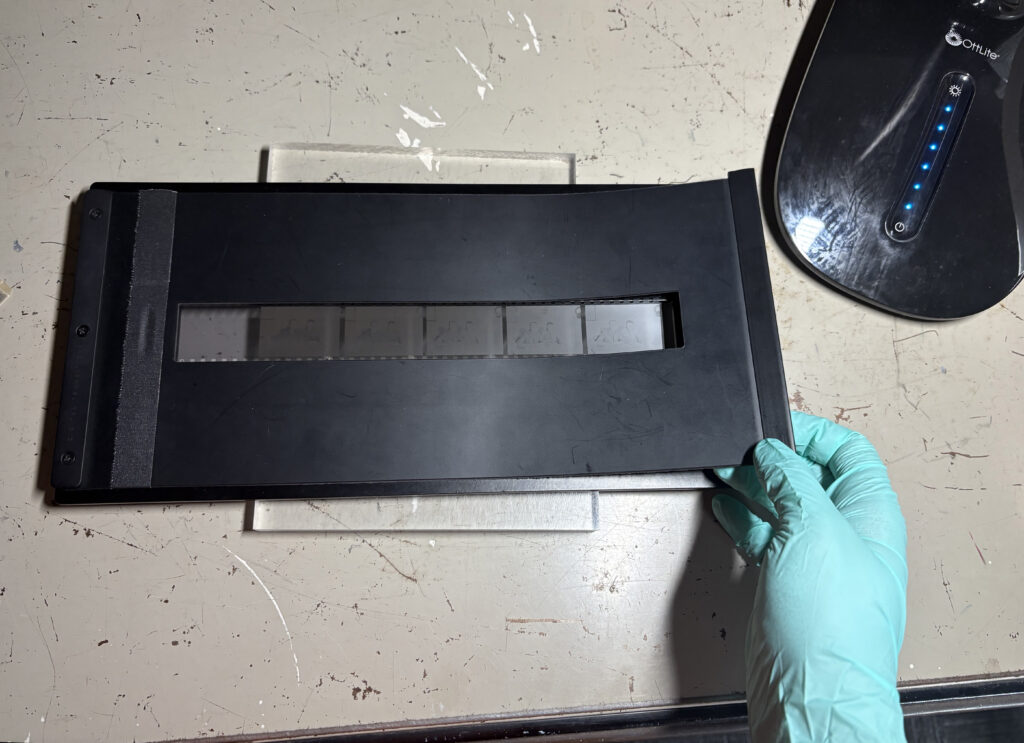
Working in the studio is always a fun experience because I get to work with a large and high quality camera that is able to take extremely detailed photographs of a multitude of materials. Film negatives, both color and black and white, are photographed using a lightbox and a special tool to hold the negatives in place. When dealing with negatives, and many other types of photographs, it is absolutely necessary to wear gloves. The oils in human skin can ruin the photographs if they are touched, so gloves protect the photo negatives from damage.
Negatives have two sides, a shiny or “base” side, and a dull or “emulsion” side. The emulsion side is where the photographic material is, but backwards. To see the proper image, you look at the shiny base side of the negative roll. In the photo negative holder, the shiny base faces the light, and the emulsion side faces the camera. Although this may seem backwards, the camera and programs that run with it are able to capture and properly orient the image. Then it is my job to make sure the image is up to standard. I rotate and crop the image, make sure the image is in focus, make sure the color is correct, and then edit the image to bring it to life.
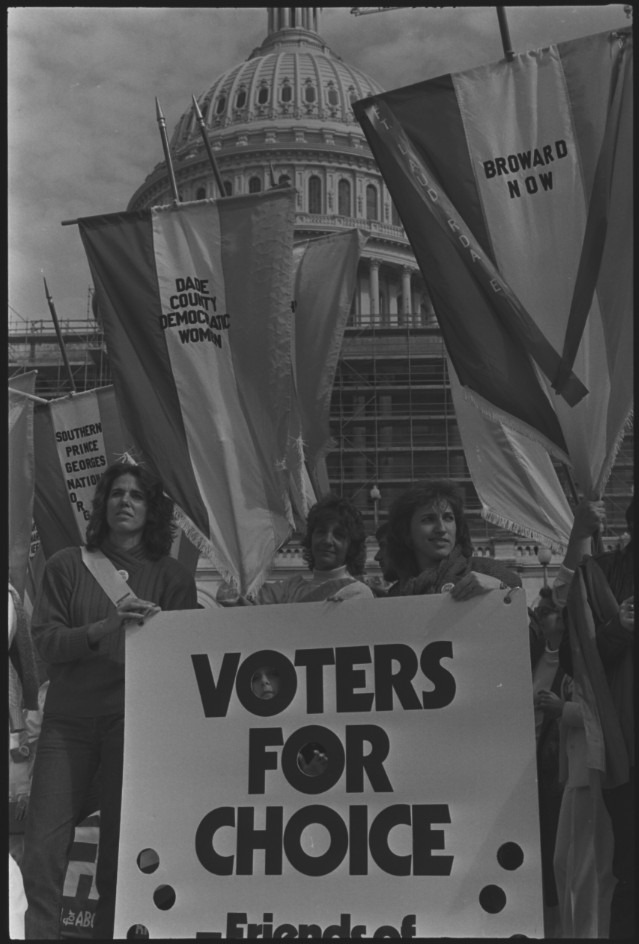

Four women with sign “Voters for Choice” and banner “Dade County Democratic Women” at the M arch for Women’s Lives, March 9, 1986 (photo by Lynn Johnson)
Black and white negatives are similar to color negatives, only slightly easier to adjust the brightness and darkness to optimize the image quality. Within the Capture One software that Digital Initiatives uses, there is a simple scale with three areas of movement: brightness, darkness, and midtones. The shifting of these three scales impacts the image significantly. Without editing the tone, the image can look dull and unappealing, however, these scales can be moved and make the image come to life. Additionally, the white balance control is absolutely necessary when editing color negatives. Black and white negatives only need some shifts in tone, but color negatives require white balance adjustments to make sure that the colors appear accurate to what the photographer really saw. White balancing a photo will take away unwanted, often blue, hues that can distort the image. The tonal editing helps both black and white and color images to be clear, appealing, and have depth.
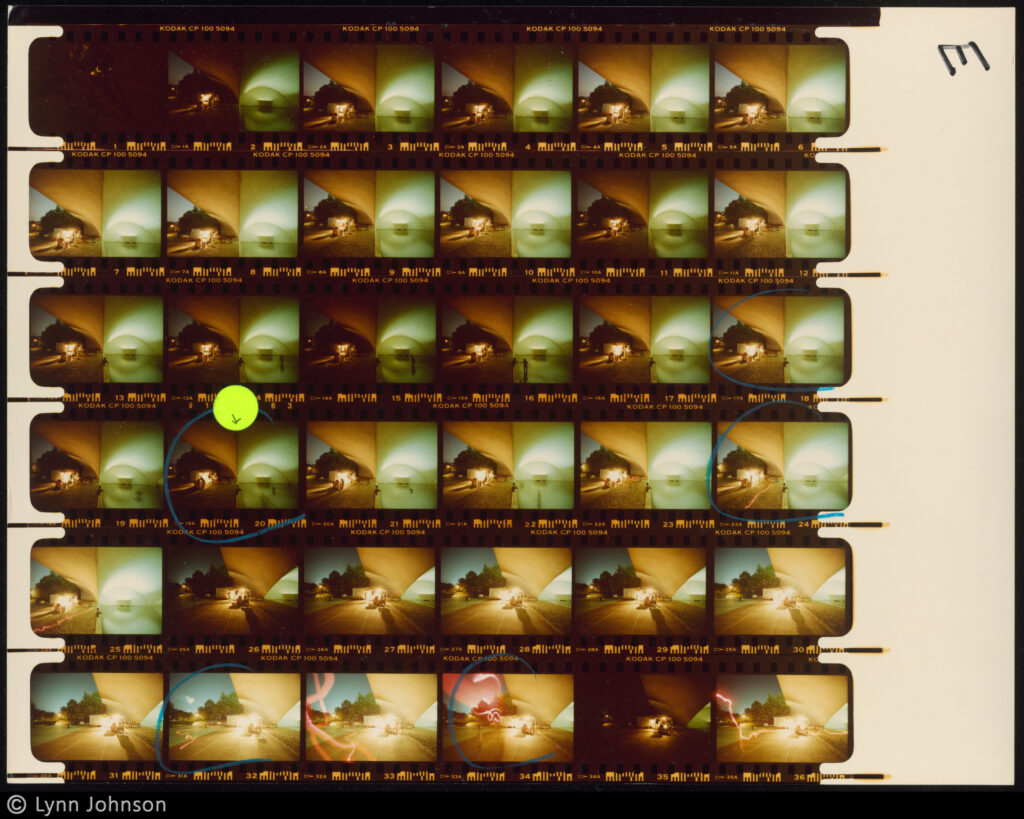
When white balancing, it is important to know what colors you are hoping to achieve. Thankfully, we have access to the contact sheets for most of the negatives that we work with. Contact sheets are a page that contains an entire roll of negatives with their baseline color or black and white image shown. The pictures are extremely tiny, however, and don’t show all the details. The contact sheets help when white balancing though because the tones and colors of the image are able to be seen in a smaller form. Comparing the contact sheet version of the digitized image is essential to make sure that I have white balanced the photo correctly, and that I am accurately representing the colors the photographer originally captured.
When working with the tone scales, it is important not to go overboard. Most photos need quite a bit of brightening, but too much can wash the image out and make it look strange. The darkening of the image is also really important to get the tone correct. The darkening scale is quickly effective, and most images don’t need a lot of darkness added. Just a little change can create a significant and important difference in the image. The midtones scale brings the last bit of zest to the image, going slightly darker or lighter on the midtones finishes off the image, and makes the scene lively.
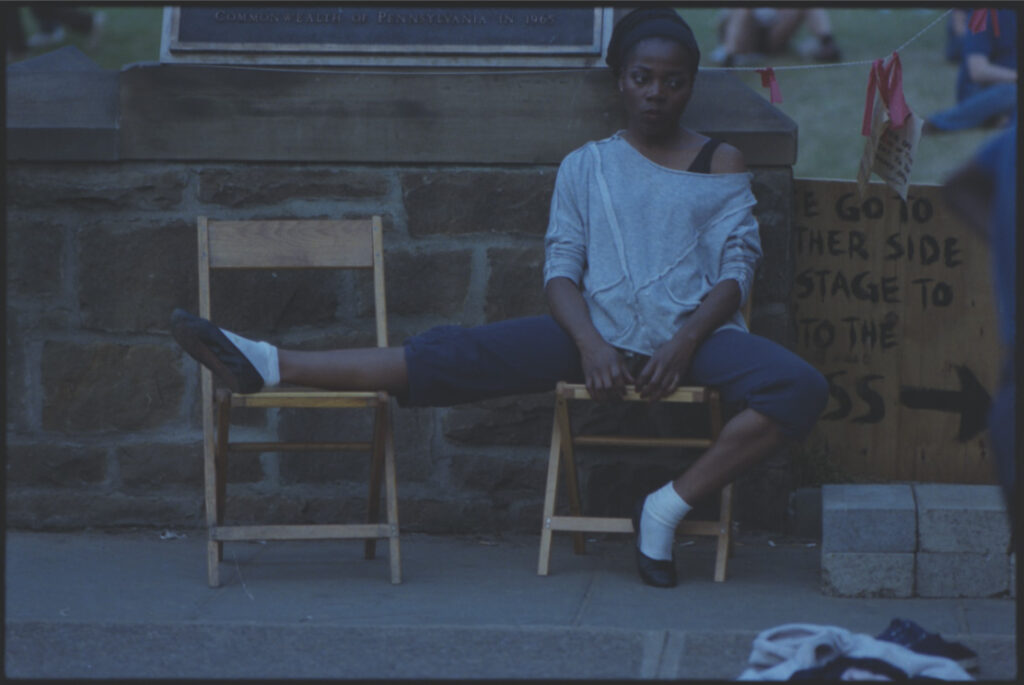
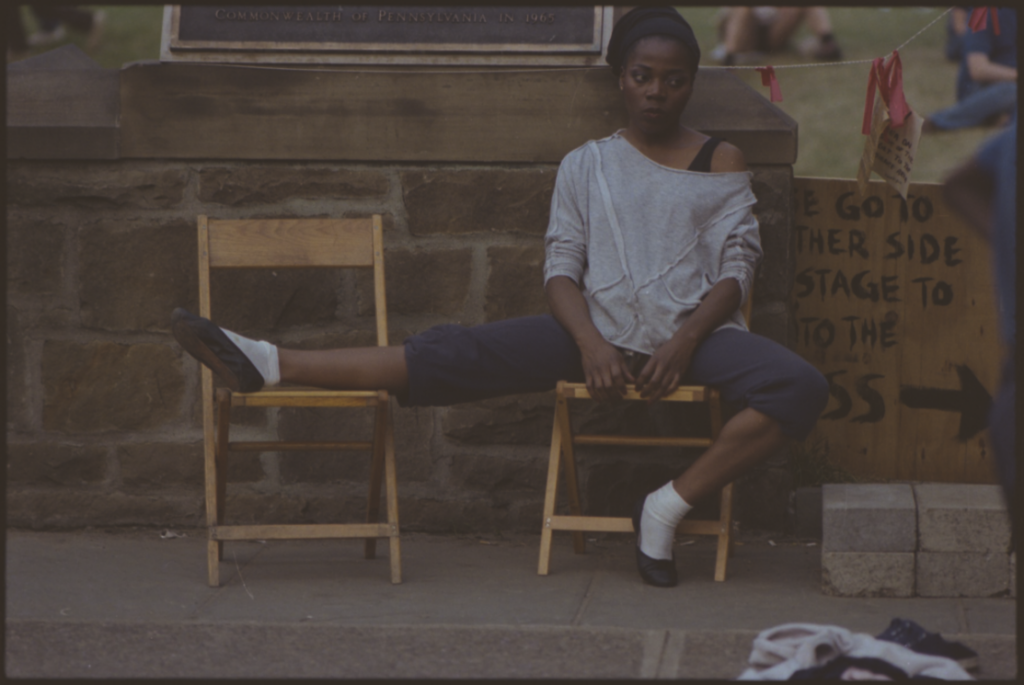
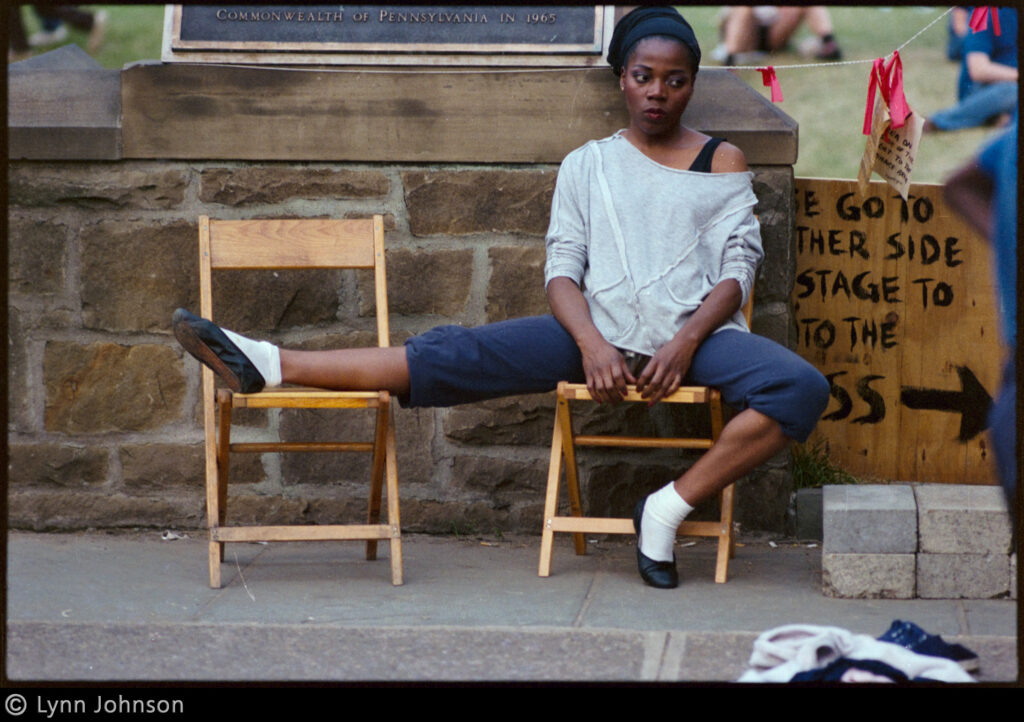
Festival performer sits on folding chair with one leg outstretched onto another, Three Rivers Arts Festival, Pittsburgh, Pennsylvania, June 1984 (photo by Lynn Johnson)
For this blog post, I have chosen some of my favorite photos and transformations to exemplify how important the editing of these photos is. Without the work editing, we would be doing a complete disservice to viewers, and to the photographer. All the photos in this post are from the Lynn Johnson Collection .
The color photos have three versions: before any editing, white balanced only, and after being tonally edited. The black and white photos have two, before editing and after tonal editing. Some of the photos have significant red spots that appear, but don’t worry! This isn’t a mistake. The red spots are the program warning us that the image is bright white in that area. These bright spots are part of the image, however, and prove that a change has occurred in the editing. When these photos are uploaded in their final form, the red spots will not be present.
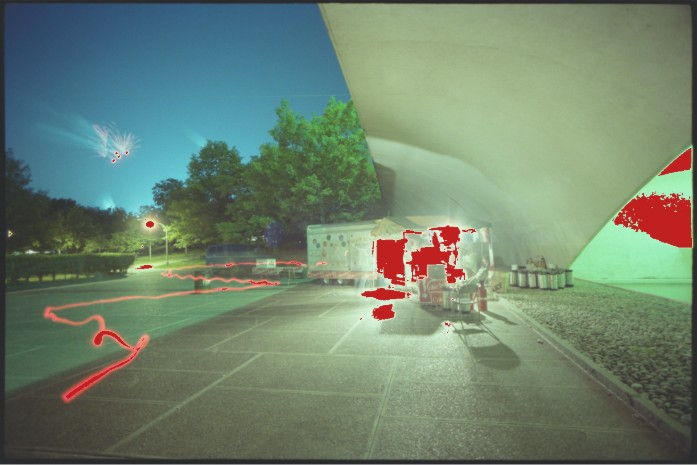
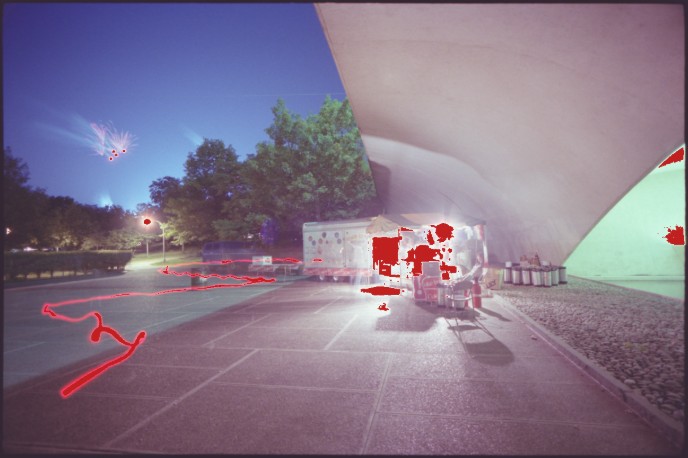
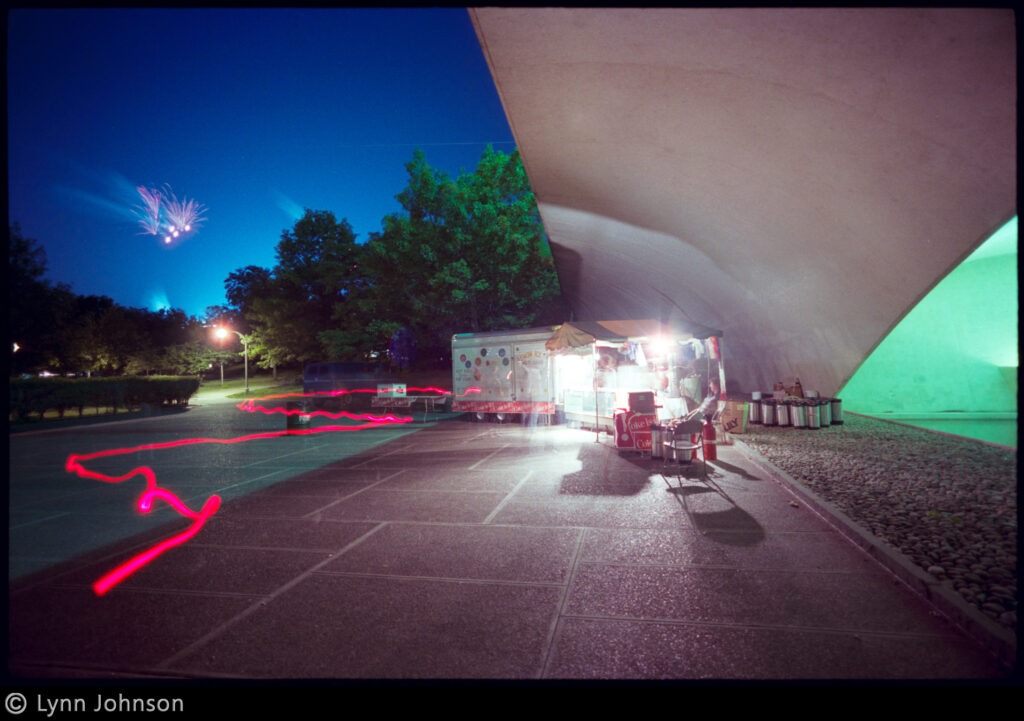
Portal Bridge at Point State Park at night, Three Rivers Arts Festival, Pittsburgh, Pennsylvania, June 1984 (photo by Lynn Johnson)
I love every part of the photo negative digitization process. Making sure that the negatives are clean and clear of dust, gently putting the images into the magnetic holder, operating the camera, and especially the editing of the images. Learning how to properly care for and work with photo negatives has been an amazing experience. I have learned more in this job than I ever expected. Coming into the Digital Initiatives, I had no idea that I would be able to work with such incredible photos, taken by an incredibly skilled photographer. I had no idea what film negatives really were, and that they needed so much gentle care. Now that I have learned about this method of artistry, I am enthralled. I can’t wait to continue to work with and edit more negatives in the future. I have become a huge fan of the photo capturing and editing process.
Bringing an image to life is wonderful. I get to step into the shoes of the photographer, and see, for probably the first time since the photo’s creation, what the artist saw in full detail. Although the figures and forms are there before editing, the real scene is invisible. Having the color corrected and toned is essential because it brings to life the scene that the photographer captured originally. I love seeing the human subjects that are lost to time. I don’t know these people’s names, lives, jobs, or anything else, but I get to see a moment in time with them. Seeing the scenes that Johnson decided were important enough to capture is wonderful. I can see and appreciate a possibly insignificant but nonetheless important event, moment, or experience that Johnson saw and decided was photo worthy. It makes my work feel impactful, and like I am doing something that has a real purpose. Allowing other people to experience the works of Lynn Johnson as she wanted them seems like a pretty good purpose to me.