These are tips and tricks to help you navigate and edit an existing page. If you need to create a brand new page, visit Add New Content .
Good Practices
Notate Revisions
When you revise a page, make a notation of the change so that you and other editors can keep track of changes.

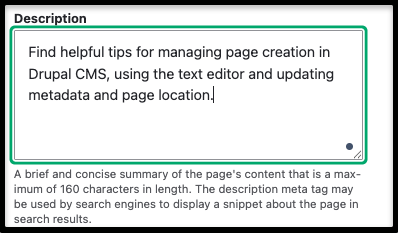
Update Metadata Description
A meta description is a short summary of a webpage's content that appears on search engine results pages. It generally informs and interests users with a short, relevant summary of what a particular page is about. IT also helps search engines prioritize and rank pages in search results.

Unlock Pages
If you open a page for editing, but make no changes, you should unlock the page so that others can access it. If you just "leave the page", then the page will remain locked for two hours.
-
Select Unlock

-
Select Confirm Break Lock
Update Page Location
Nesting pages correctly ensures proper website structure and allows users to navigate easily using the breadcrumbs. It also makes it easier for the web editor to organize and locate pages in Drupal.
Create the correct URL path for the page by choosing the appropriate parent folders under Page Location (found in the right panel of the Edit screen.) Note: Selecting a page location does not auto-populate a top or left navigation menu with the page name.
-
Find Your Page
Once logged in and on the group page, select Nodes within the tabbed menu. Editors should see all currently created content within their group. The drop down menus above the content listing allows editors to filter items based on two categories:
- Published status
- (Content) Type
In addition, the content listing is within a sortable table. Editors can click on the column header for Title, Content type, or Updated to sort the listing by that category. This makes it easy to group content types together or to see the most recently updated page.
You can also search for a specific node by the Page Title or URL.
-
Open Node to Edit
Method 1
Click Edit node in the row of the piece of content you want to edit. This will take you directly to the editing window. You must open the page this way in order to update the page location or Permalink (URL).

Method 2
OR, click the title of the node you want to edit. Then, while viewing content, select Edit from the task menu at the bottom of the page. You cannot update the Permalink or Page Location when editing the page via this method.

-
Save Page Options
After making an update but before selecting the Save button, content managers need to make a decision about what will happen next. Options within this drop-down include:
- Draft: When a web page (node) is saved as “draft,” the page is saved in Drupal but the page is not visible to the public. The node is only visible at the webcms link after logging into Drupal. Users may edit a draft node, or save it as “needs review” or “published,” depending on the status of the content and if it is ready to be publicly shared.
- Needs Review: A node may be saved as “needs review” when content is waiting for approval before being published. Users may view the node at the webcms link after logging into Drupal, but the content will not be publicly visible in this state either. Also, when a node is at “needs review” status, users in the Editor role are prevented from modifying content until the node state returns to either “draft” or “published.”
- Publish: When a node is saved as “published,” it is publicly visible from the www.ohio.edu link. Users can update a published node and save the node as a draft or “needs review” if the changes need to be approved before being publicly visible. In this case, the edited (but-not-yet-live) version can be accessed through the Drupal node editor. (Available only to Publishers.)
- Archived: When a node is saved as “archived,” it will not be visible to the public. Users can archive a published node to pull it down from the website. Anyone that visits the link for the page will receive a 404 error in their internet browser. If you need to bring an archived page back onto the website, you can save it as “published” and it will be visible again and able to be edited. This does mean that the current view of the page will be live again.(Available only to Publishers.)
-
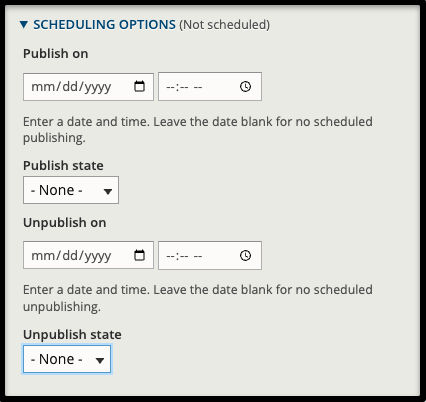
Set a Future Publish Date
You can set a future publish date for any content type so that it does not publish before you want it to. Due to the backend system setup, scheduled publishing works best when scheduling a page to publish at least 24 hours in advance.
- Scheduling Options are found in the right side panel.
- Add the date and time. Note: Set the time to the top of the hour as the system will check and publish at the top of each hour (ex: 1:00, 2:00, 3:00, etc).
- Choose the State.
- You can also schedule an Unpublish date.
You can always manually publish a page at any time and it will publish immediately.

Unpublish vs. Archive
As mentioned under the Save Page Options section, when you archive a page it is not viewable to the public, but the only way to reinstate an archived page is to publish it live again. Archive should only be used if you think a page is going to eventually be deleted.
There is an option to unpublish a page without archiving it. You should use this option if a page needs to be taken down temporarily (generally to make updates to it). You can only access the option from the bulk change function on the node listing page.
- Select the node(s)
- Open the Action dropdown menu
- Choose Unpublish Current Revision
- Choose Apply to Selected Items

