- News & information
- About
- History
- George V. Voinovich
- George V. Voinovich Collection
- Calendar
- How to Find Us
- News
- Archives
- Photojournalism Fellowship Project
- Photo Essays
- Current Fellow
- Previous Fellows
- Reports and Publications
- Archives
- Students
- Prospective
- Center for Entrepreneurship
- Environmental Studies
- HTC/Voinovich School Scholars
- Master of Public Administration
- Current
- HTC/Voinovich School Scholars
- Center for Entrepreneurship
- Environmental Studies
- Master of Public Administration
- Alumni
- Contact
- School Leadership
- Strategic Partners Alliance
- Ohio University Public Affairs Advisory Committee
- Ohio University Public Affairs Advisory Committee
- Faculty and Fellows
- Faculty
- Visiting Professors
- Voinovich Fellows
- Professional Staff
The Handlebar Fixture (I.Urieli)
A Case Study in Welding Fixtures
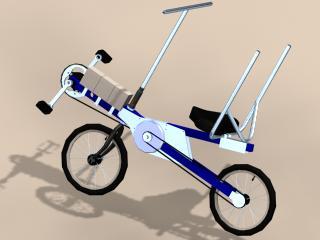
The Senior Design sequence is about to embark on the third stage of the design - building and evaluating the prototype. Since September 2001 I have been designing an electric bicycle, somewhat in parallel with the Senior Design sequence, but without some of the restrictions that have been imposed on the Senior Design project (refer: www.eBiciBikes.com ). The current design of the eBici bike is shown in the picture.
Notice that both the handlebar T and the seat frame (shown without the nylon mesh back) are welded structures which we will be manufacturing from thin-walled steel tubing (7/8" x 0.035 - 4130 Chromoly). These are the only welded parts on the bike that we will be making since the fork is being purchased as a complete unit.
I have noticed that many of the 3PT frames that are being built in the design sequence involve welded structures, so I decided to present this case study to discuss what is involved in manufacturing the handlebar T.
Precedent
One should always begin a design with precedent. I first came across the welded handlebar T structure on the very popular BikeE recumbent bicycle. Check out the picture of Dr. Bob proudly sitting on his BikeE, comfortably holding his handlebar T. During 2000 I designed the Grasshopper 5 FWD (front wheel drive) and RWD (rear wheel drive) recumbent bikes in which I did use a similar design for the handlebar T. I first made them out of thinwalled stainless steel, however discovered that the stress placed on the handlebars were such that the handlebars actually bent - so I replaced them with 4130 Chromoly steel. I have noticed that on the scooter design only one team has considered the stress placed on the handlebar T by the rider - it can be quite significant.
The eBici Handlebar T - DFM (Design for Manufacturability)
One of the major problems of manufacturing the handlebar stem is having the stem welded square and central to the handlebar. This requires a fixture to hold the pieces in place while it is being welded. Even the well controlled TIG welding process (which I use exclusively) will cause the pieces to bend and distort during the welding process. For prototype purposes a welding fixture can be made out of thick plywood - since it is only required for one time usage it does not matter if it gets burned and destroyed during the welding process, however for a repeatable manufacturable process a professional fixture should be built. We had our fixture built by master machinist Dwight Griesemer from Reading, PA who has been building fixtures for many years.
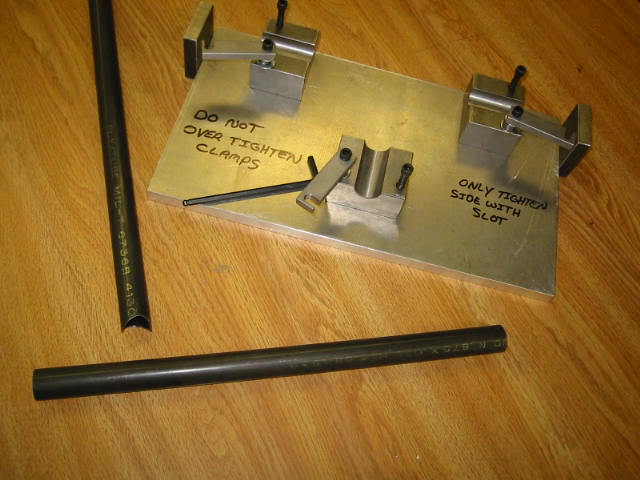
We first prepare the tubes for welding by "notching" the handlebar stem, so that it will fit smoothly on the handlebar ( notcher1 , notcher2 ). The welding fixture is shown in the following picture. Click on the picture to see how the tubes are mounted on the fixture. The welder will first weld the one side, flip and clamp the tube, and then complete the weld on the other side.
Contact Information:
(740) 593–9381 | Building 21, The Ridges
Ohio University Contact Information:
Ohio University | Athens OH 45701 | 740.593.1000 ADA Compliance | © 2018 Ohio University . All rights reserved.


